AWS offers a large number of resources and services. With such diverse options, it is very easy to over-spend money in AWS and obviously, you do not want that. No matter you are an expert developer, administrator or just starting with AWS, you should always keep eye on your AWS usage and its bills. Therefore, the first thing you should do after creating your AWS account is set up the billing alarm🚨 for your account. In this blog post, I am going to show you how to create a billing alarm on AWS.
Login to your AWS Account
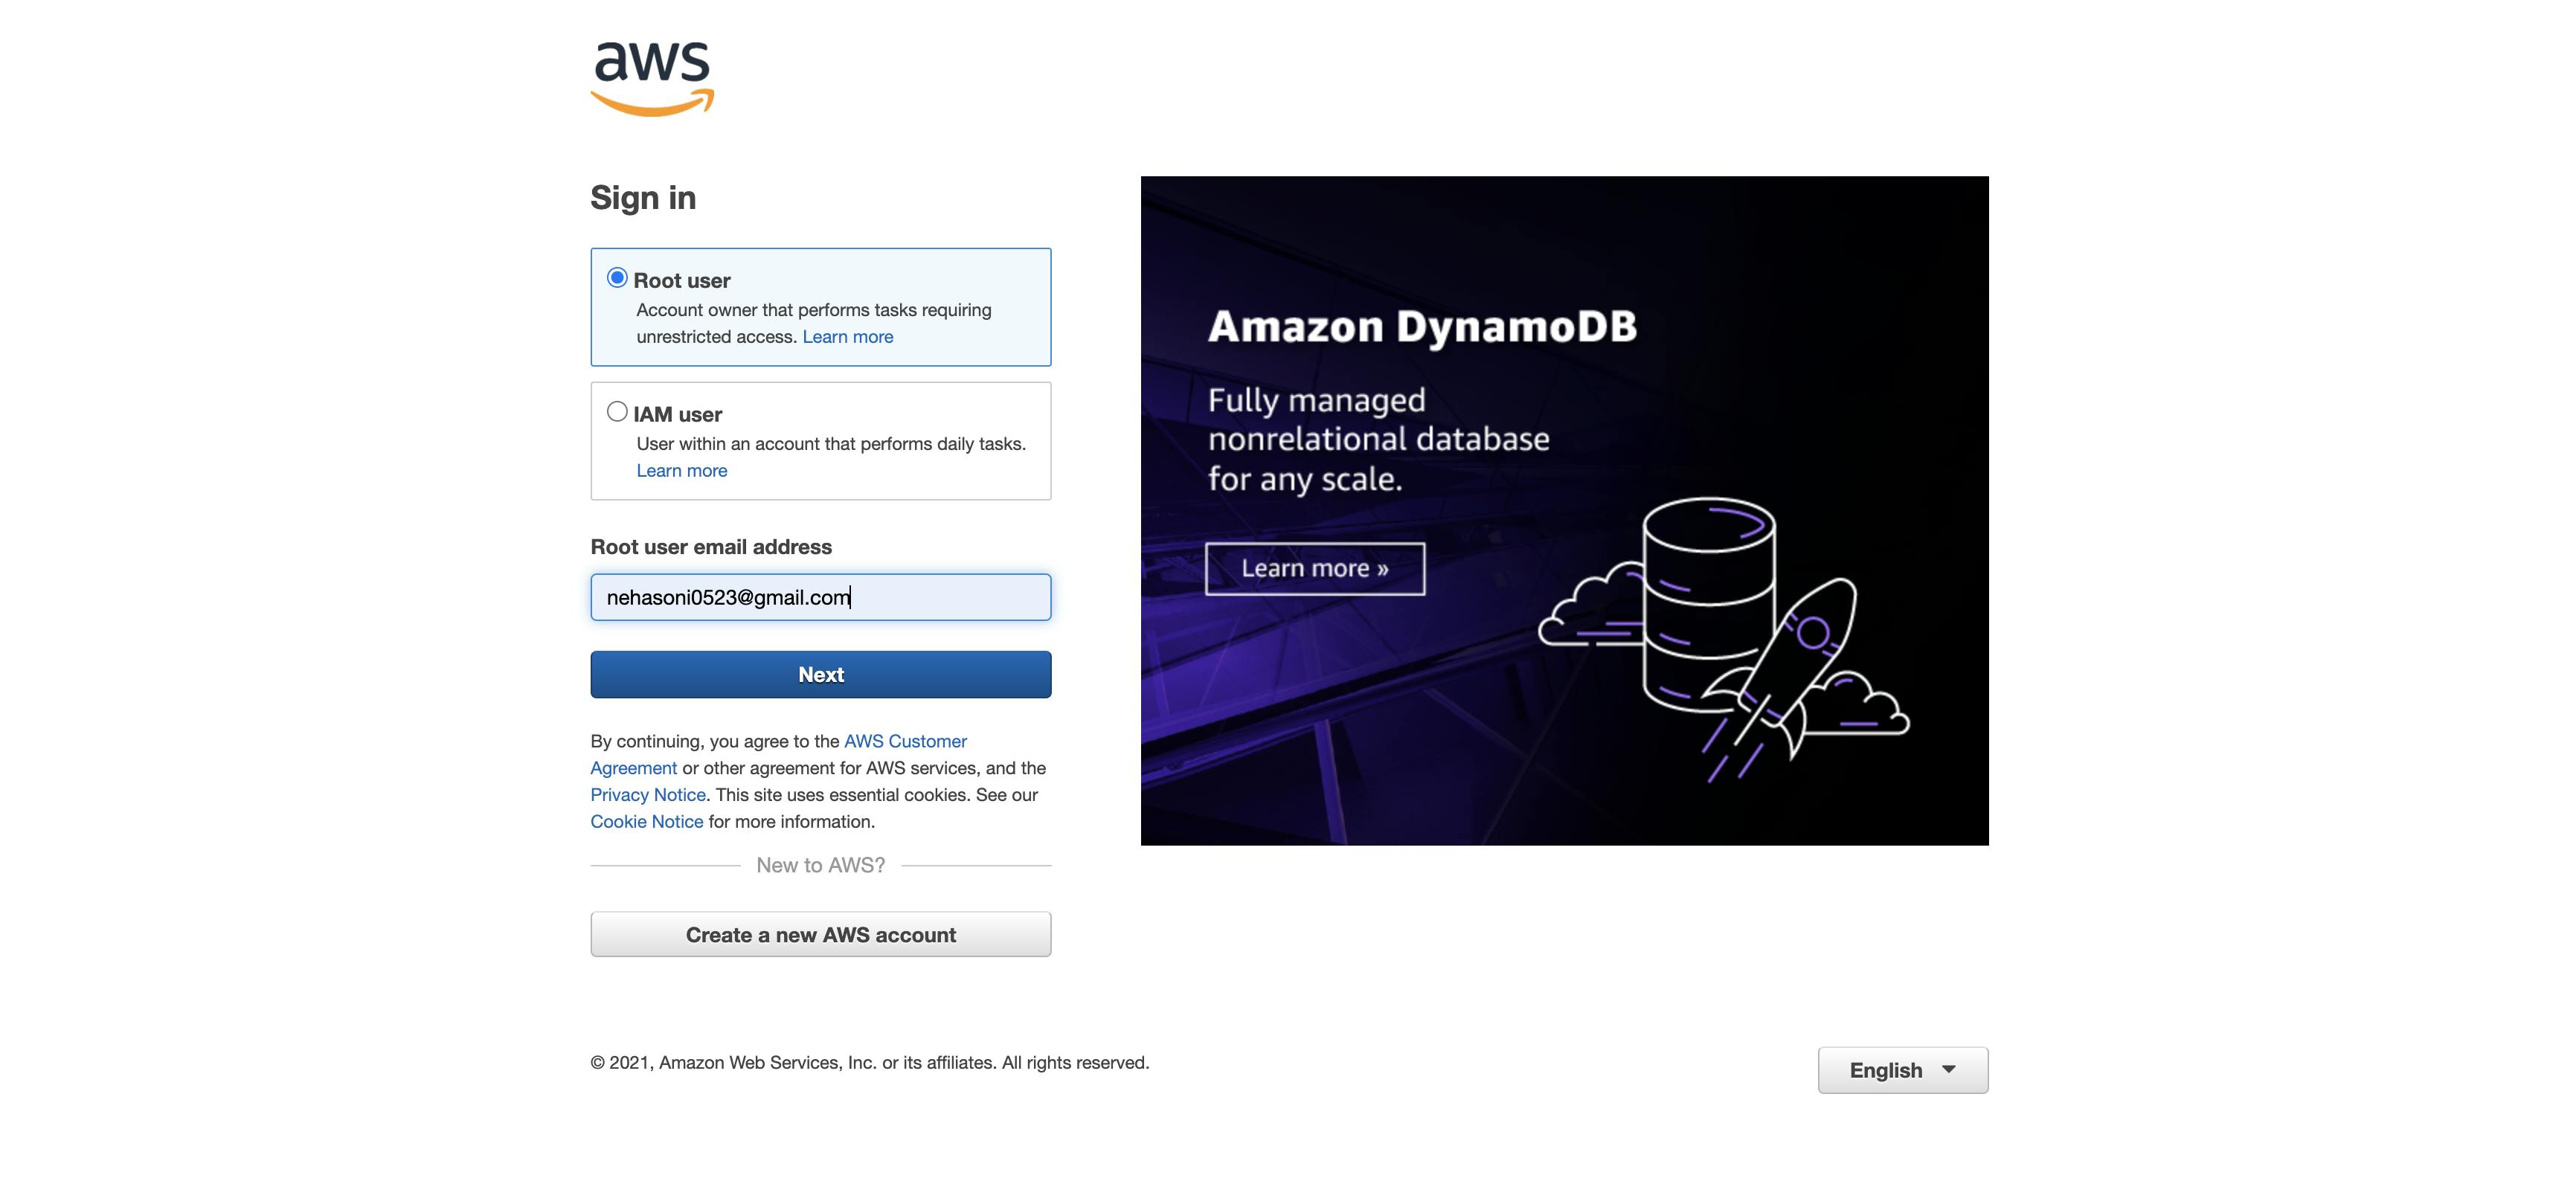
Open your favorite browser and navigate to AWS Login Page
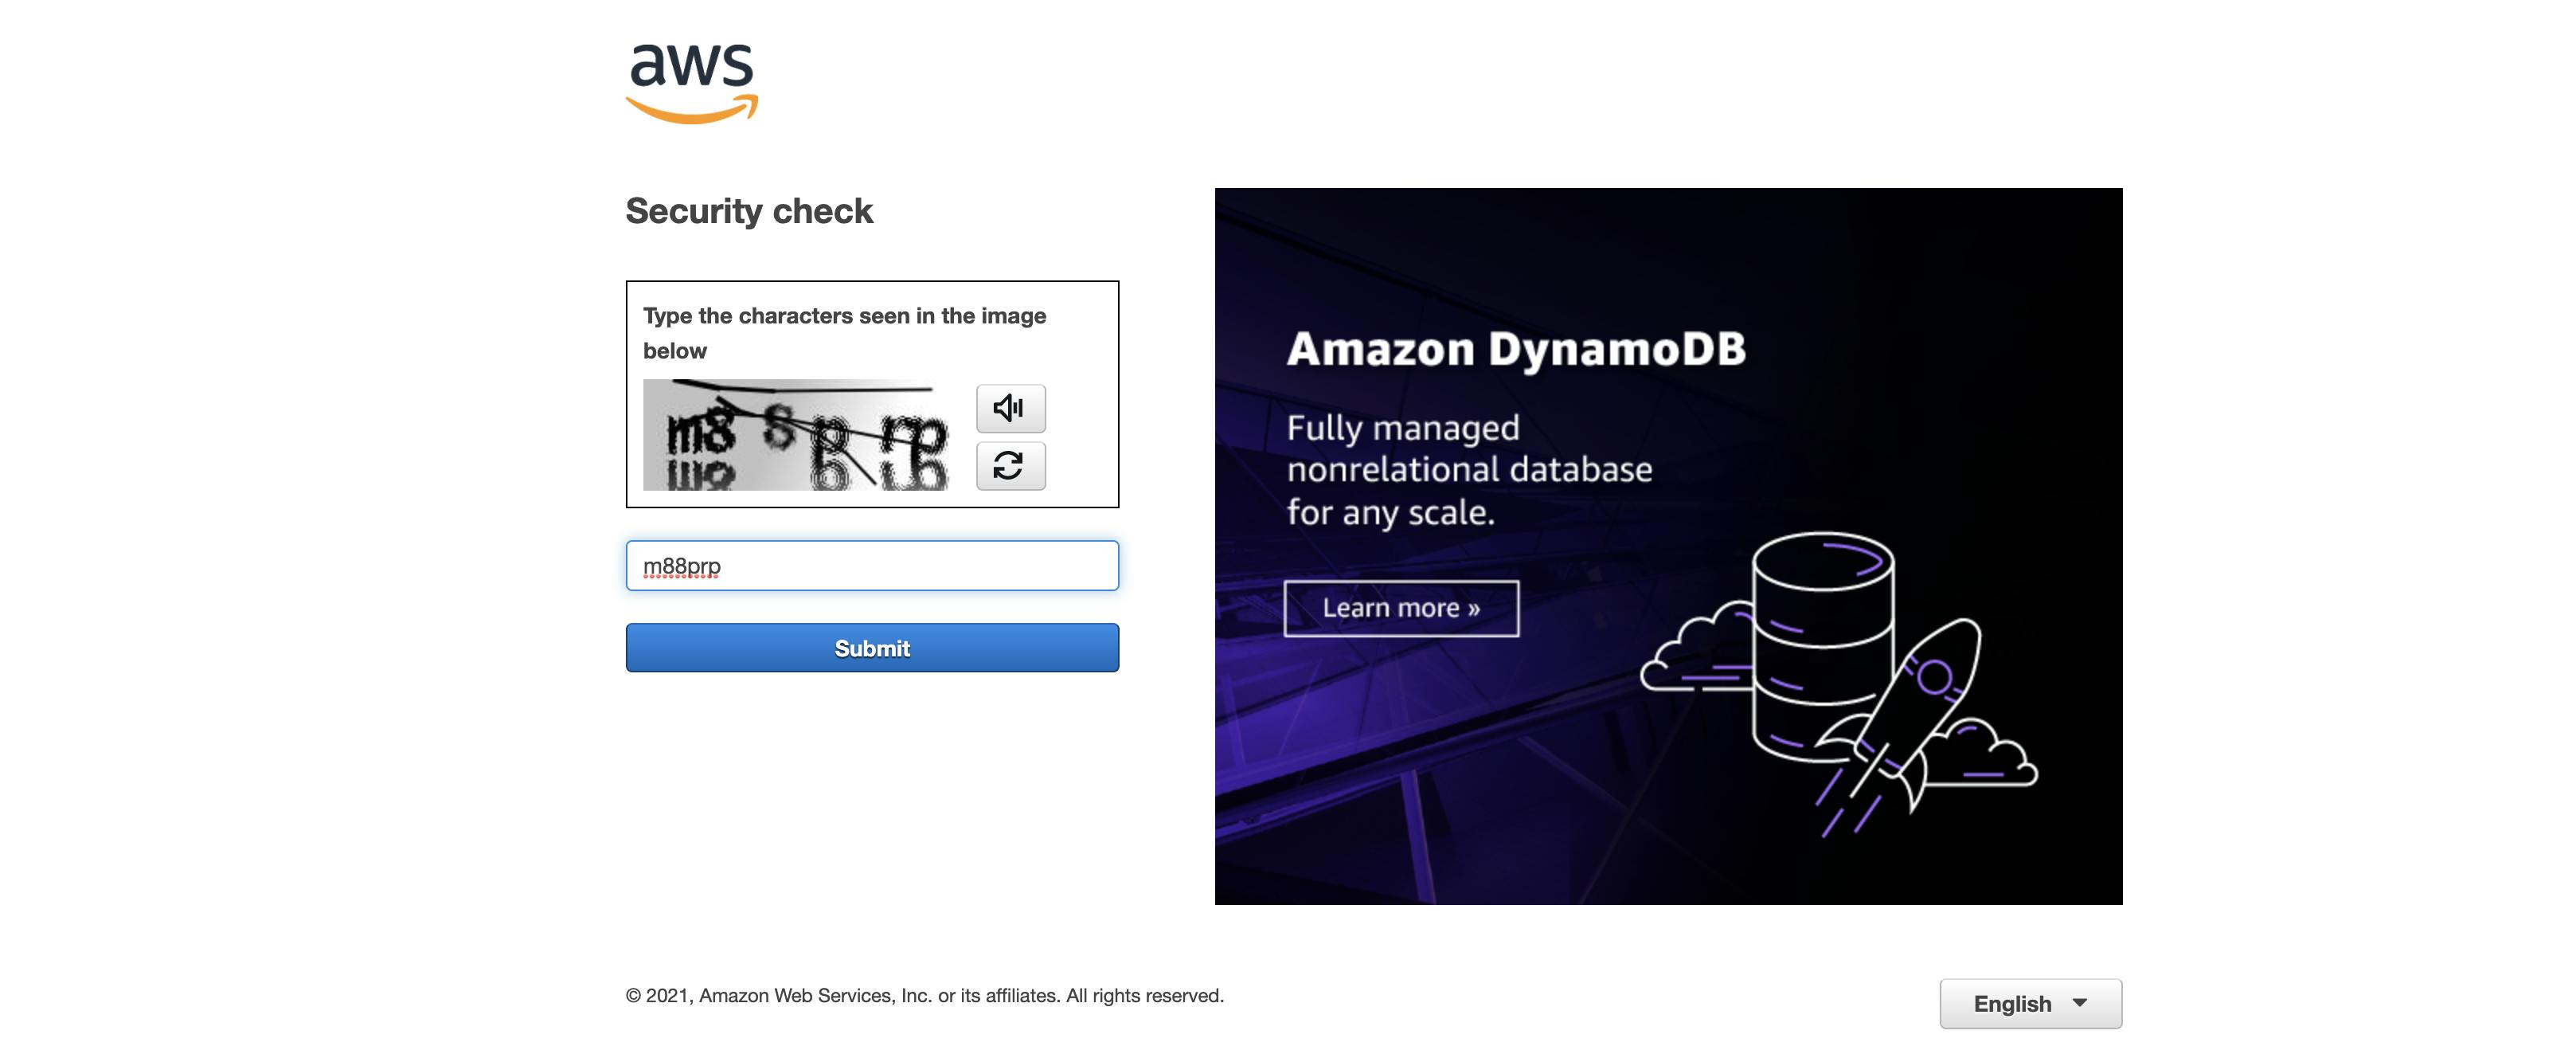
 Enter the captcha and click done.
 Then enter in your password and click submit.
You have now successfully signed in to the AWS Management Console
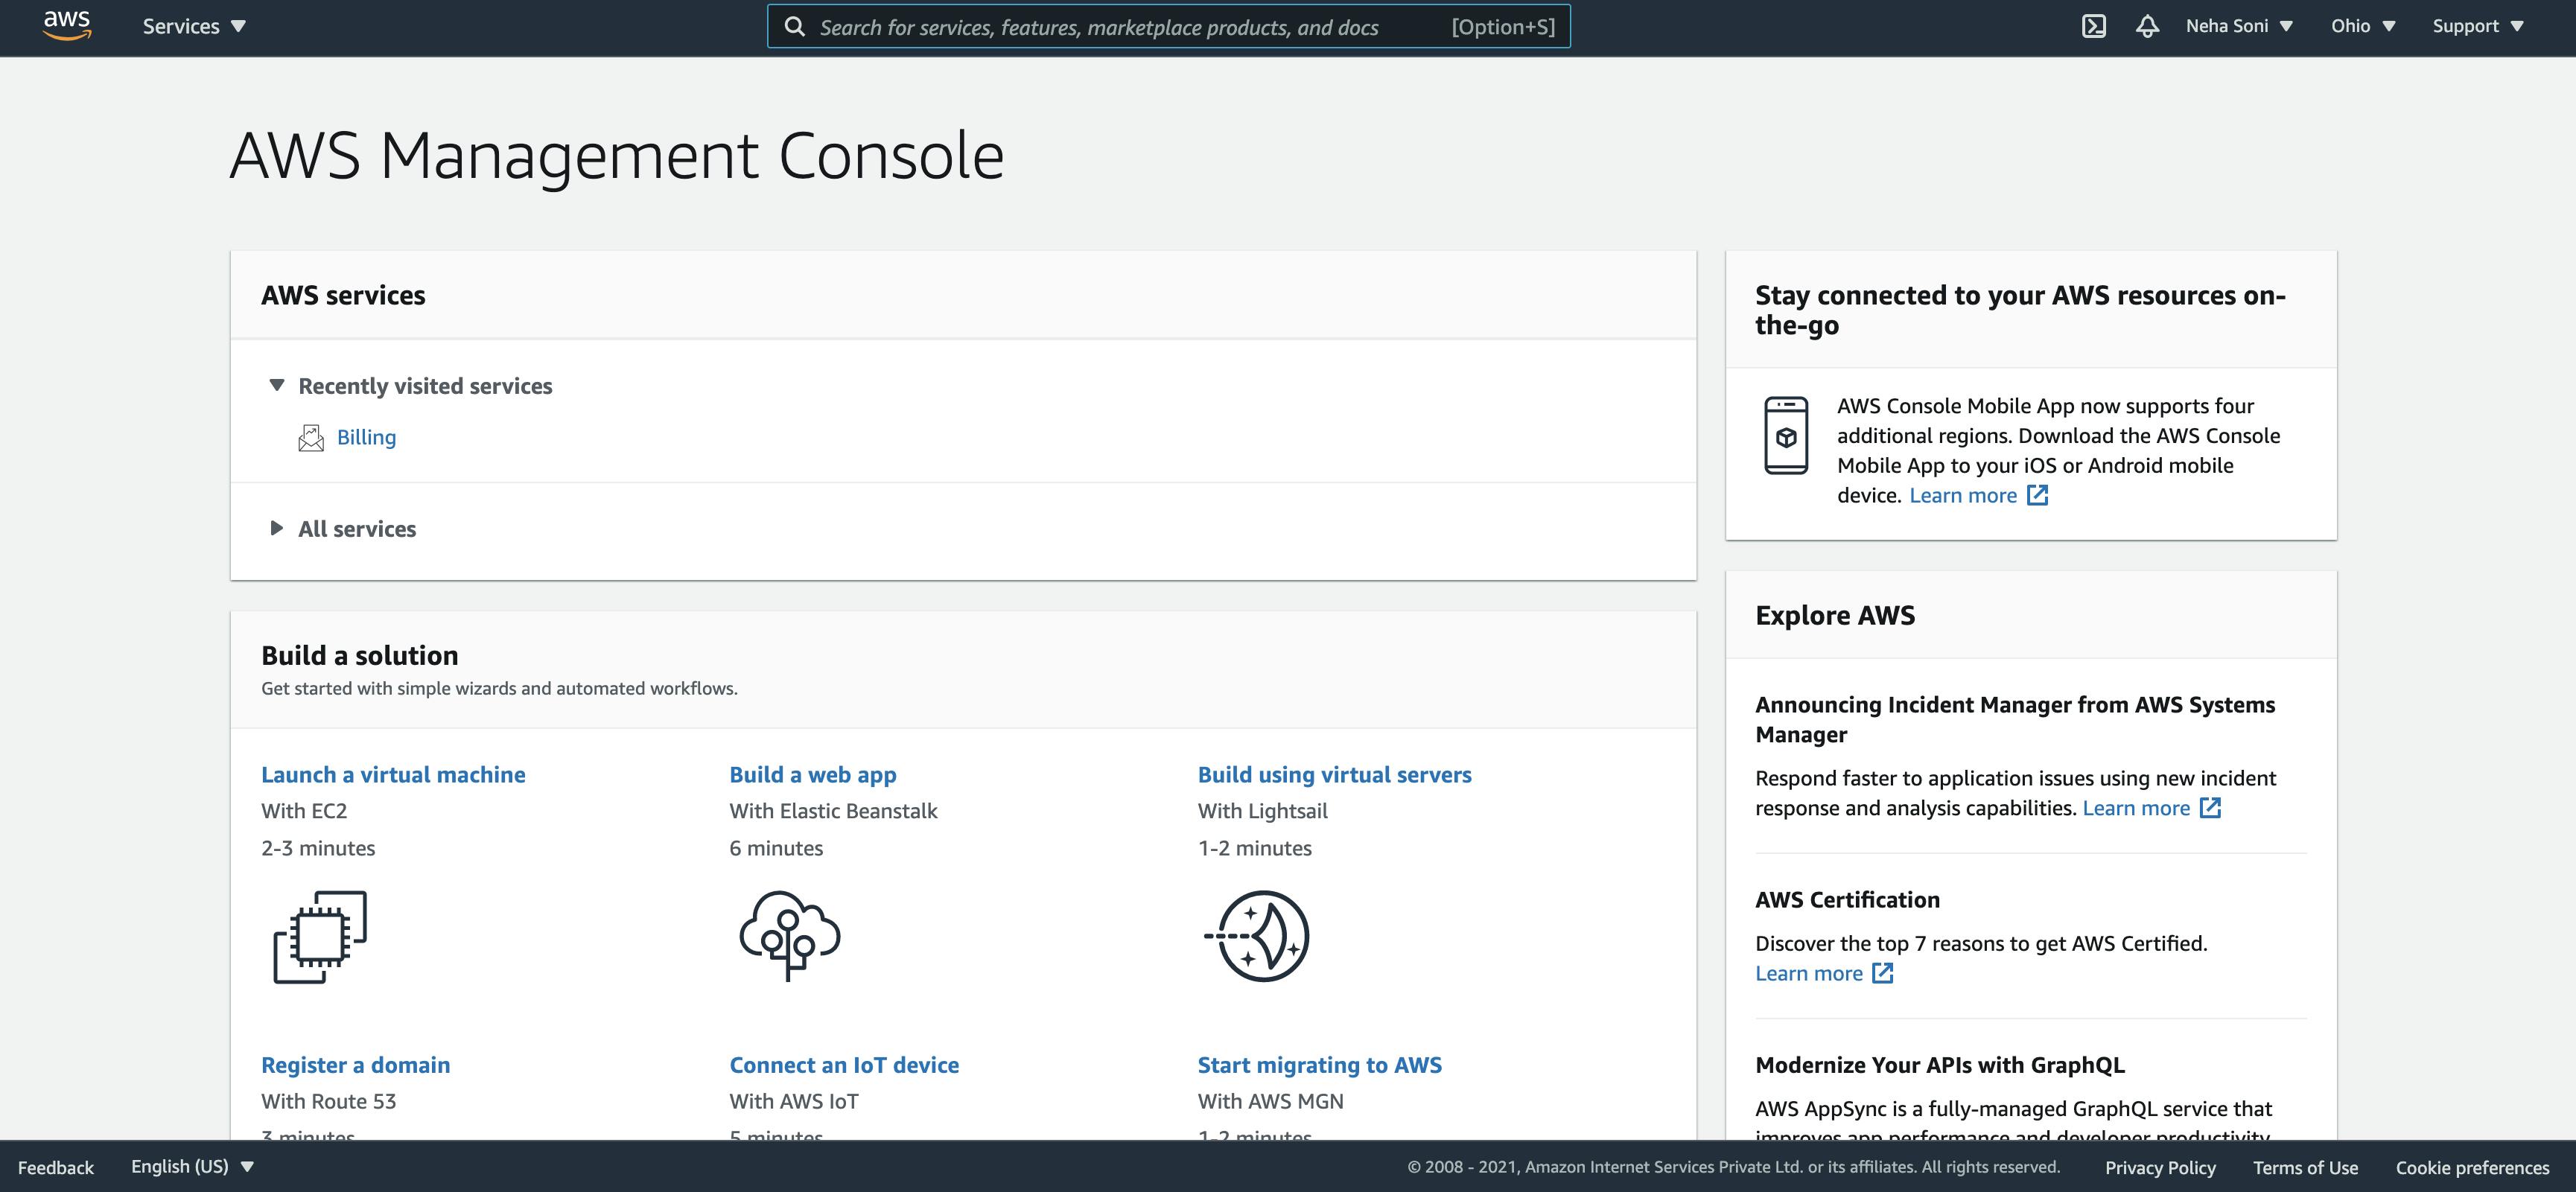
Go to Billing & Cost Management Dashboard
In the search bar type billing and click on Billing service to navigate to Billing & Cost Management Dashboard

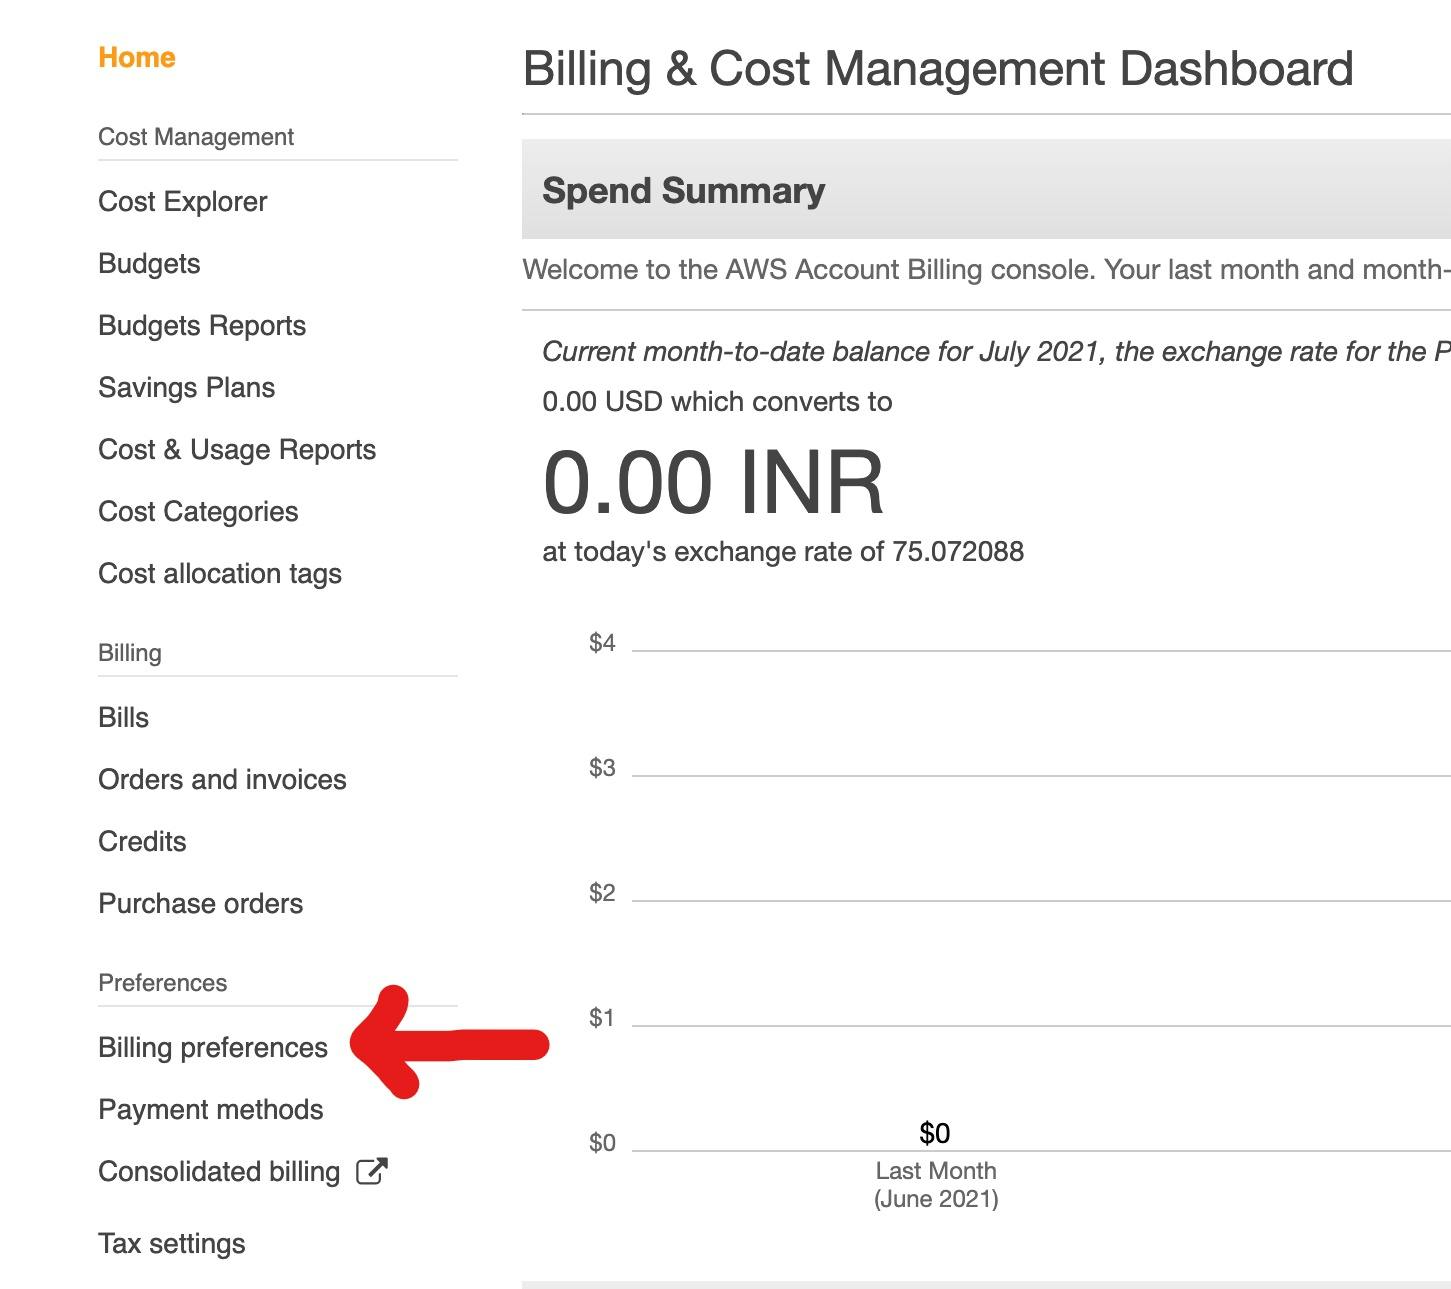
On the left side of the page, you should see an option called Billing Preferences.
 Click on that option, and you will be taken to the Billing Preferences page. Here you see three options. Choose receive billing alerts and Receive Free Tier Usage Alerts, and enter your email and click save preferences.
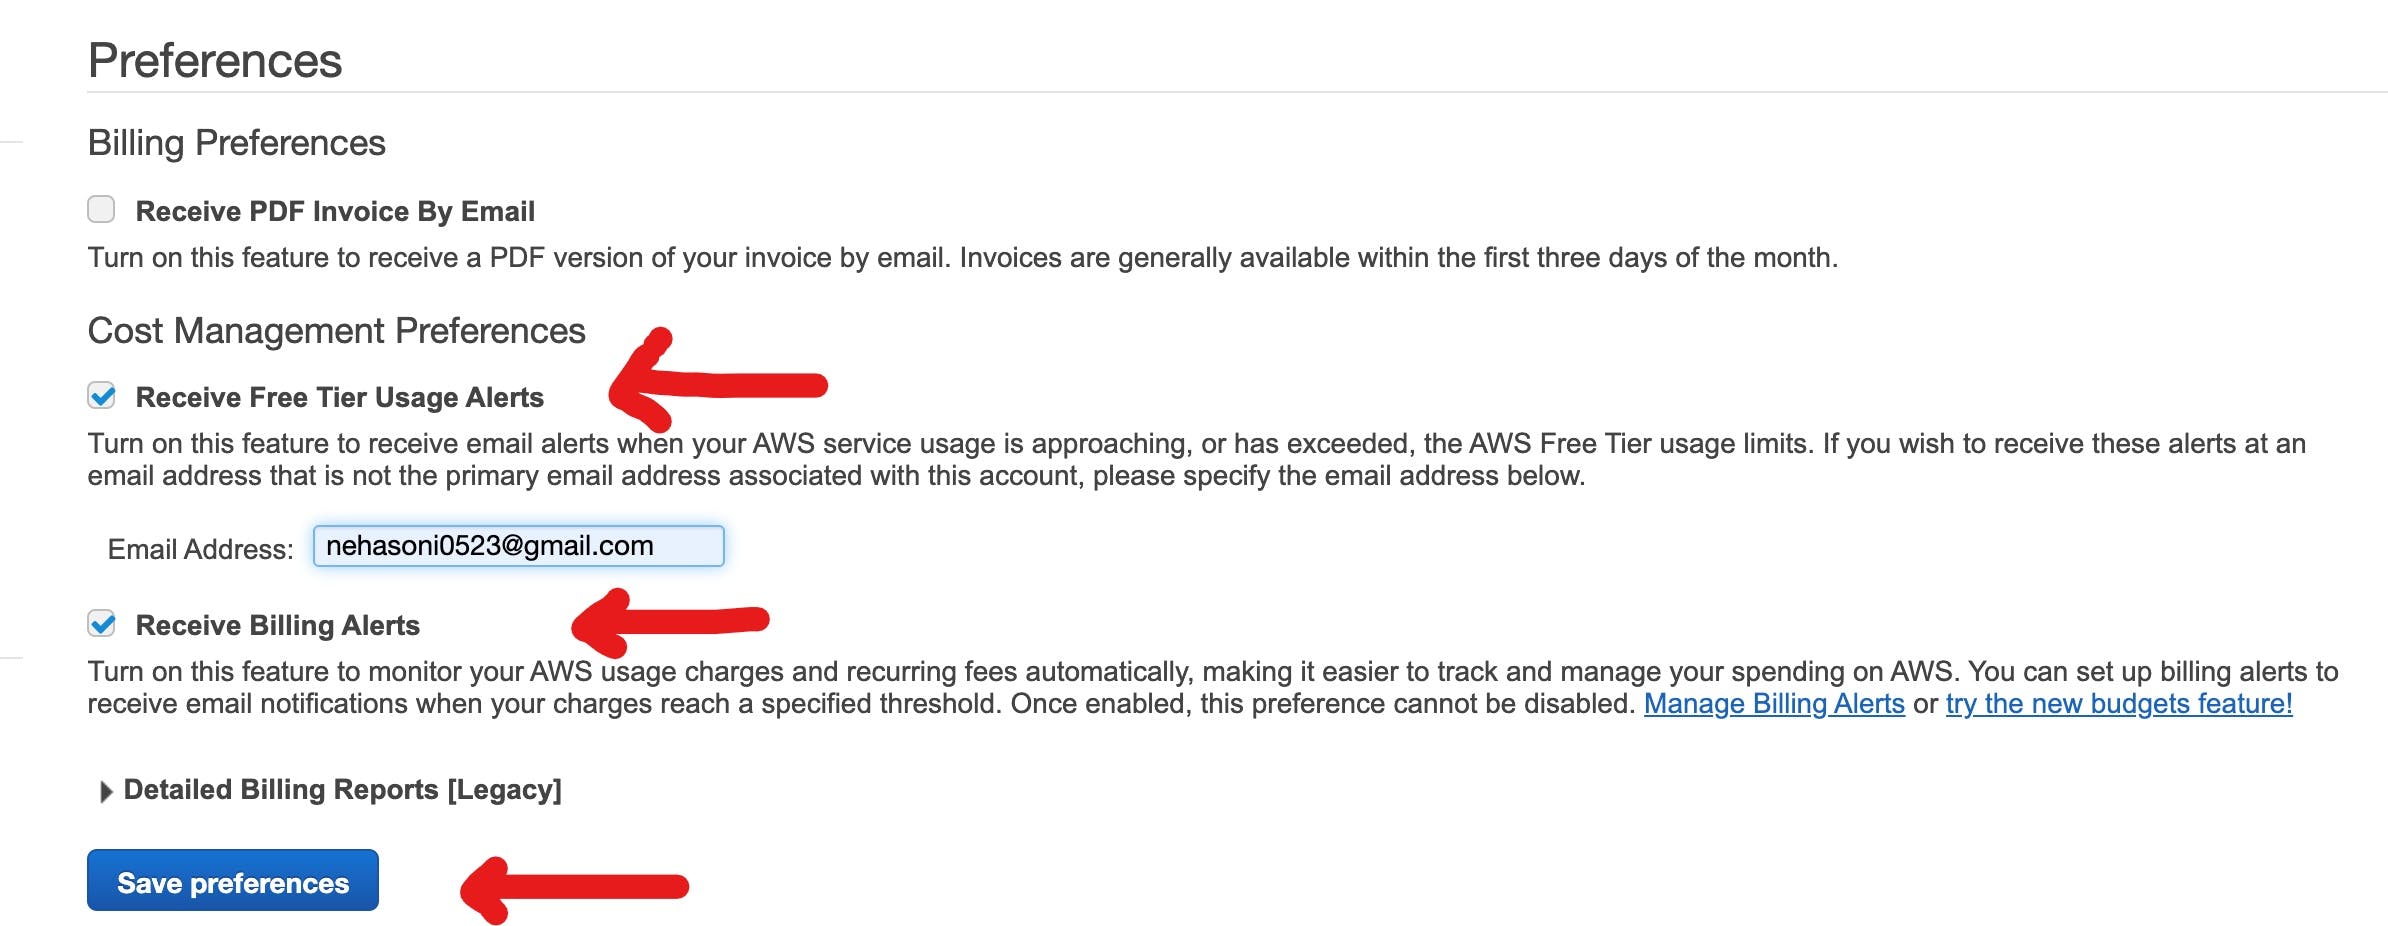 Now, we will receive an alert to our email address if we reach the free tier limit.
Go to CloudWatch and Check the current AWS region
You can even search for CloudWatch here by starting to type in the search box and it will find the service that you're searching for. Or you can click on the drop-down along with services and then you can see all the services by category.
"CloudWatch is a monitoring and management service that provides data and actionable insights for AWS, hybrid, and on-premises applications and infrastructure resources. With CloudWatch, you can collect and access all your performance and operational data in form of logs and metrics from a single platform."
Important:- Check your current AWS region. You can check your region in the top-right corner. You have to select the region as Northen Virginia or “us-east-1”.
Create a Billing Alarm 🚨
On the left side of the page, you should see an option called Alarm. Click on it and then click Create Alarm button on the right side of the page and it will navigate to a new page.
 Click Select metric. After that click Billing. and then Total estimated charge.
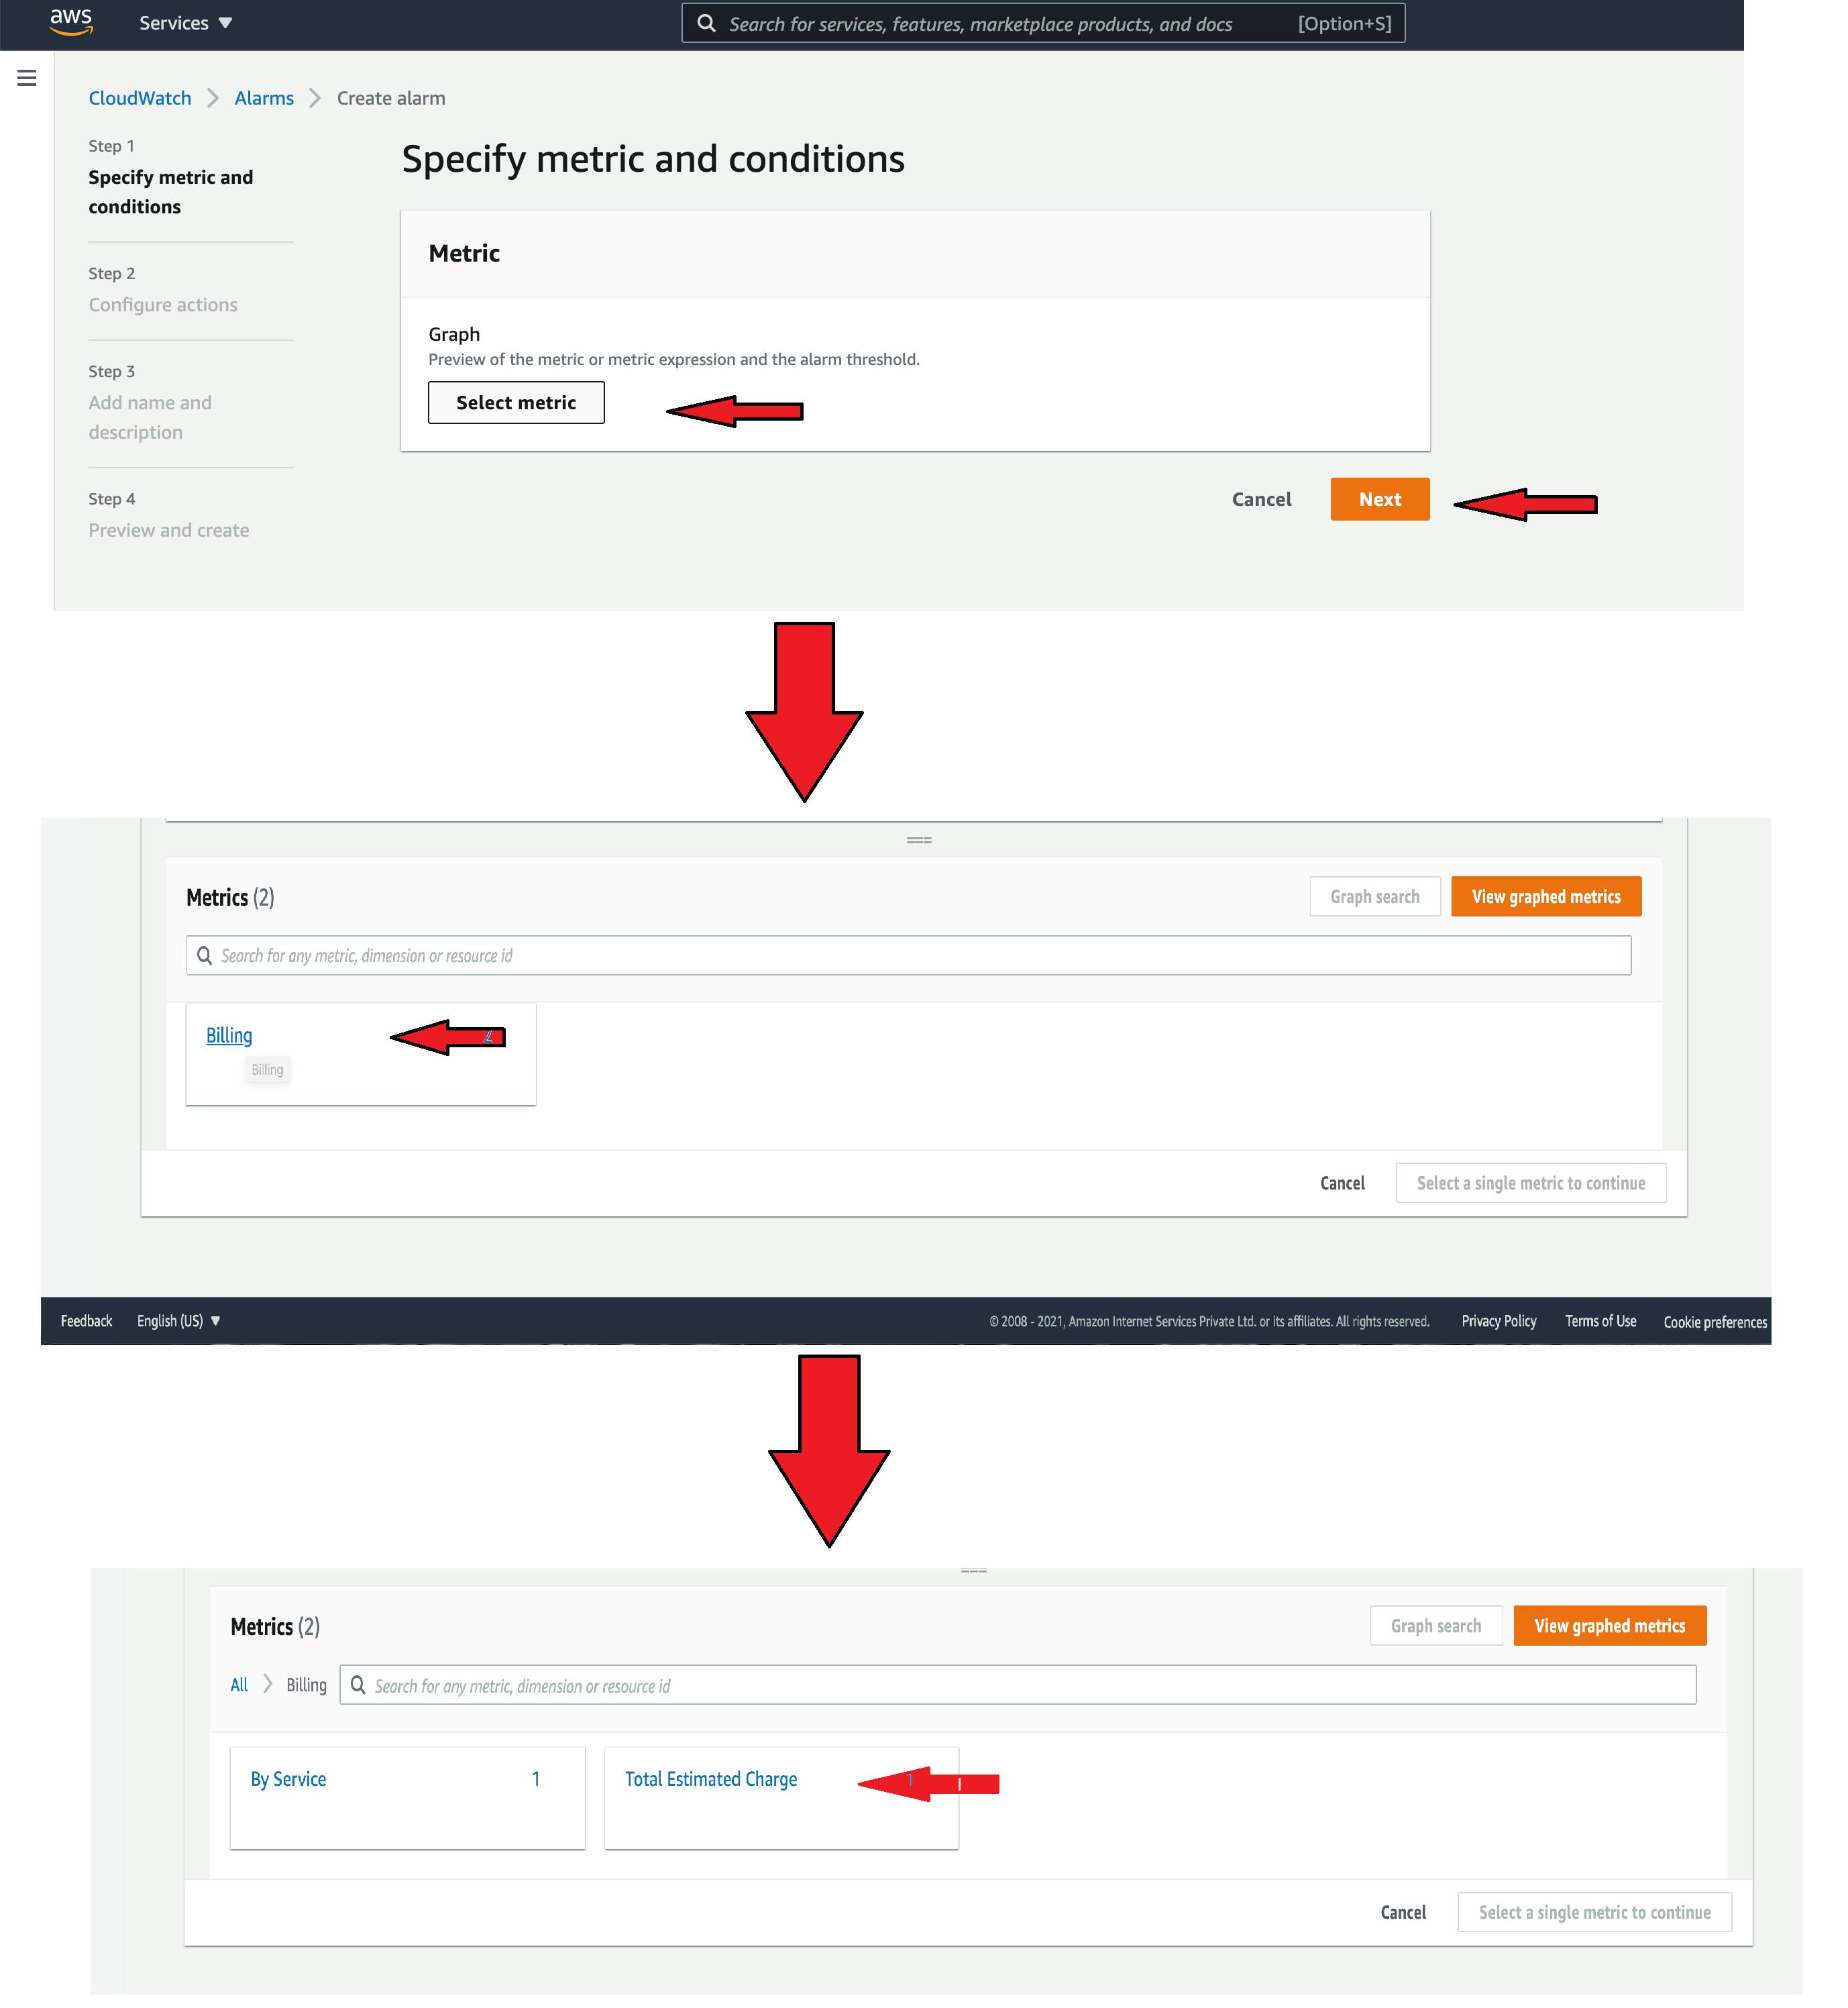 On the next page choose currency as USD and click a select metric button.

Setting up Conditions
In this step, you need to choose conditions that will trigger this alarm. Select the threshold type as Static. Then for an alarm condition, choose, “Greater”. Finally, enter the threshold value for your bill.
I am keeping it at $5. This means once we have bills greater than or equal to $5, we will get an alert from AWS.
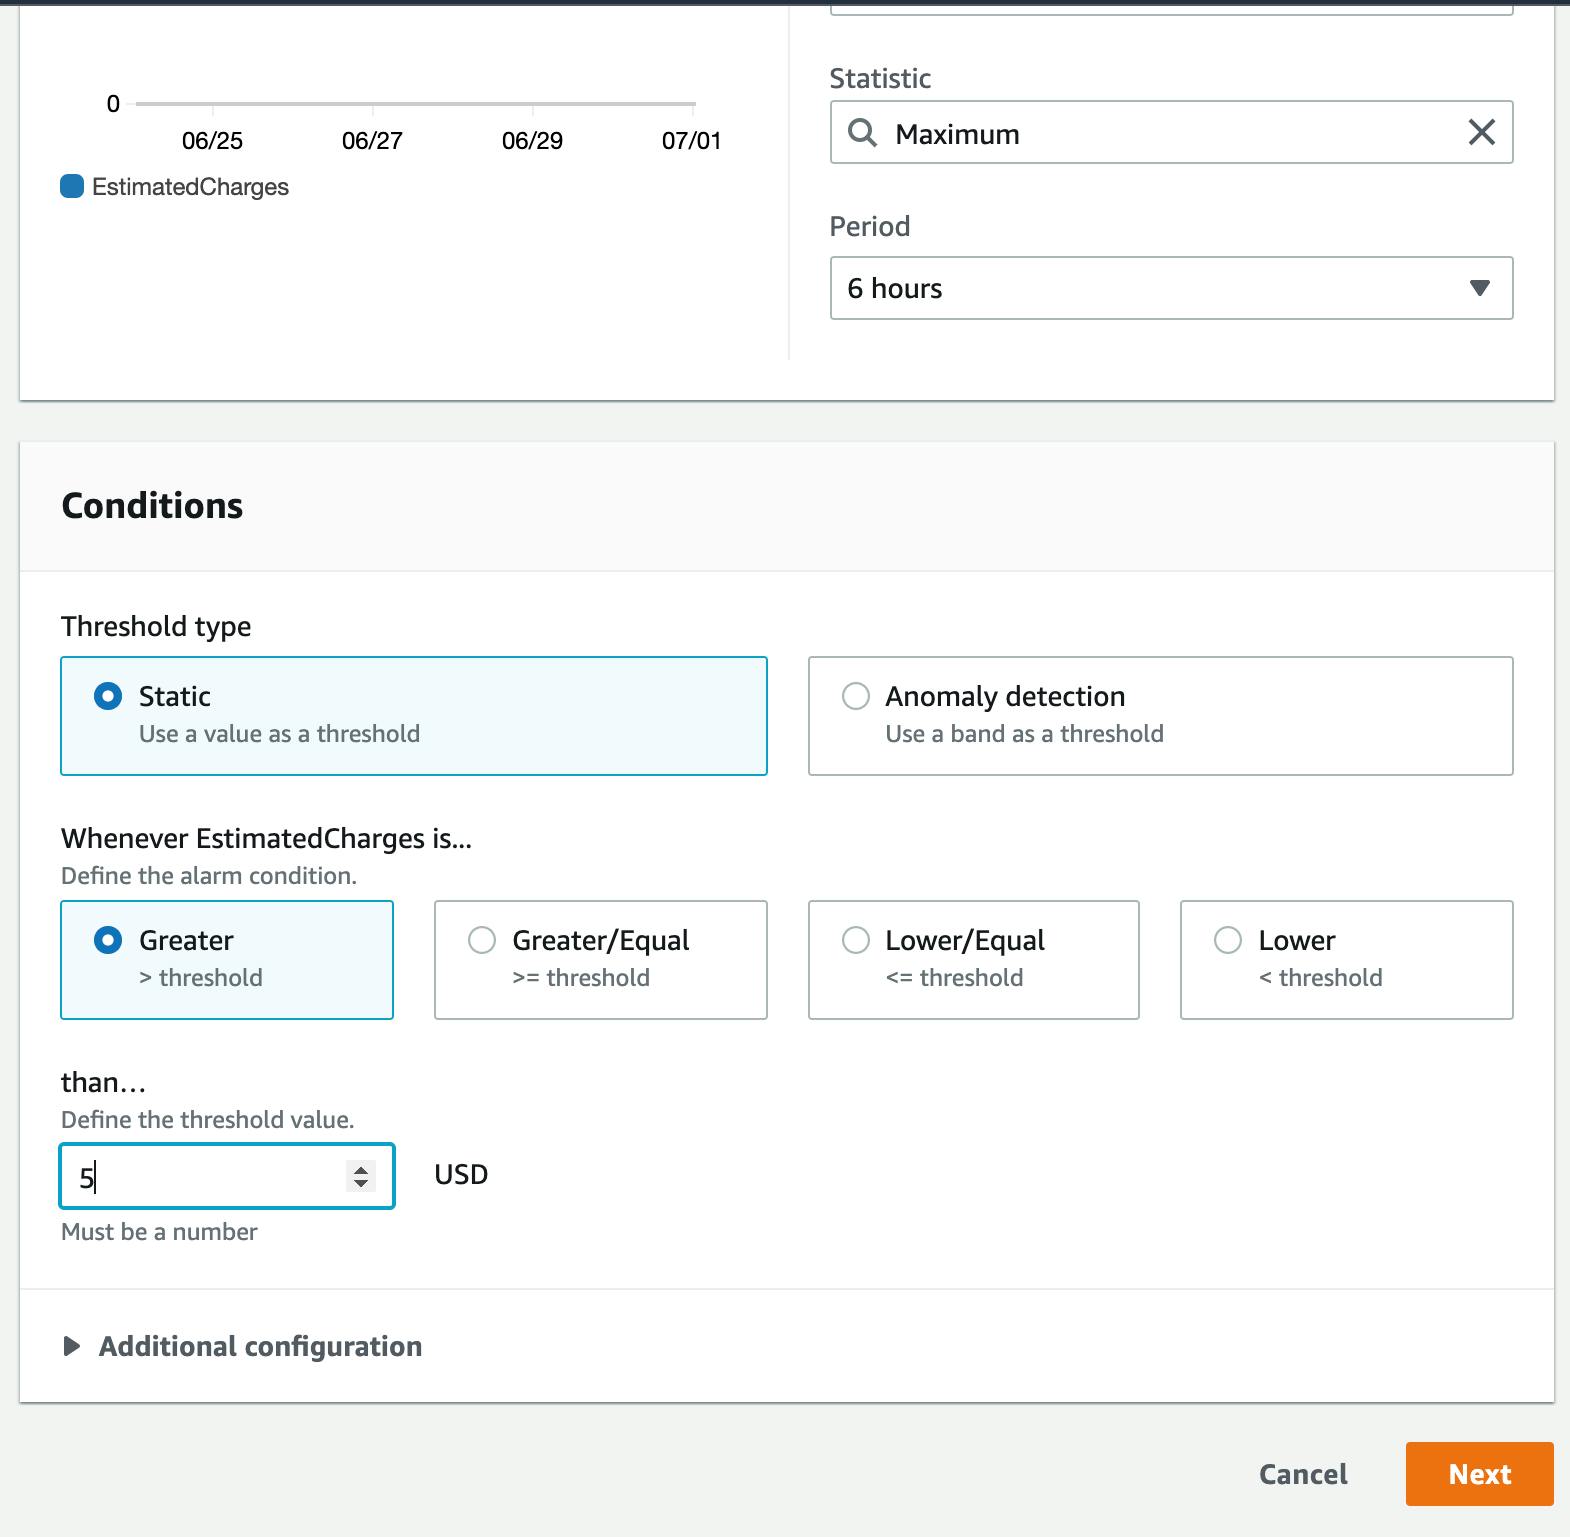 Click on the Next button.
Create SNS(Simple Notification Service) Topic
Amazon SNS is a service that can notify you via various transport protocols when an alarm gets triggered.
Create a new topic radio button. Then you have to give a name for this topic, and an email id to notify when this alarm is triggered. After that, click on the “Create topic” button. This should create a new SNS topic.
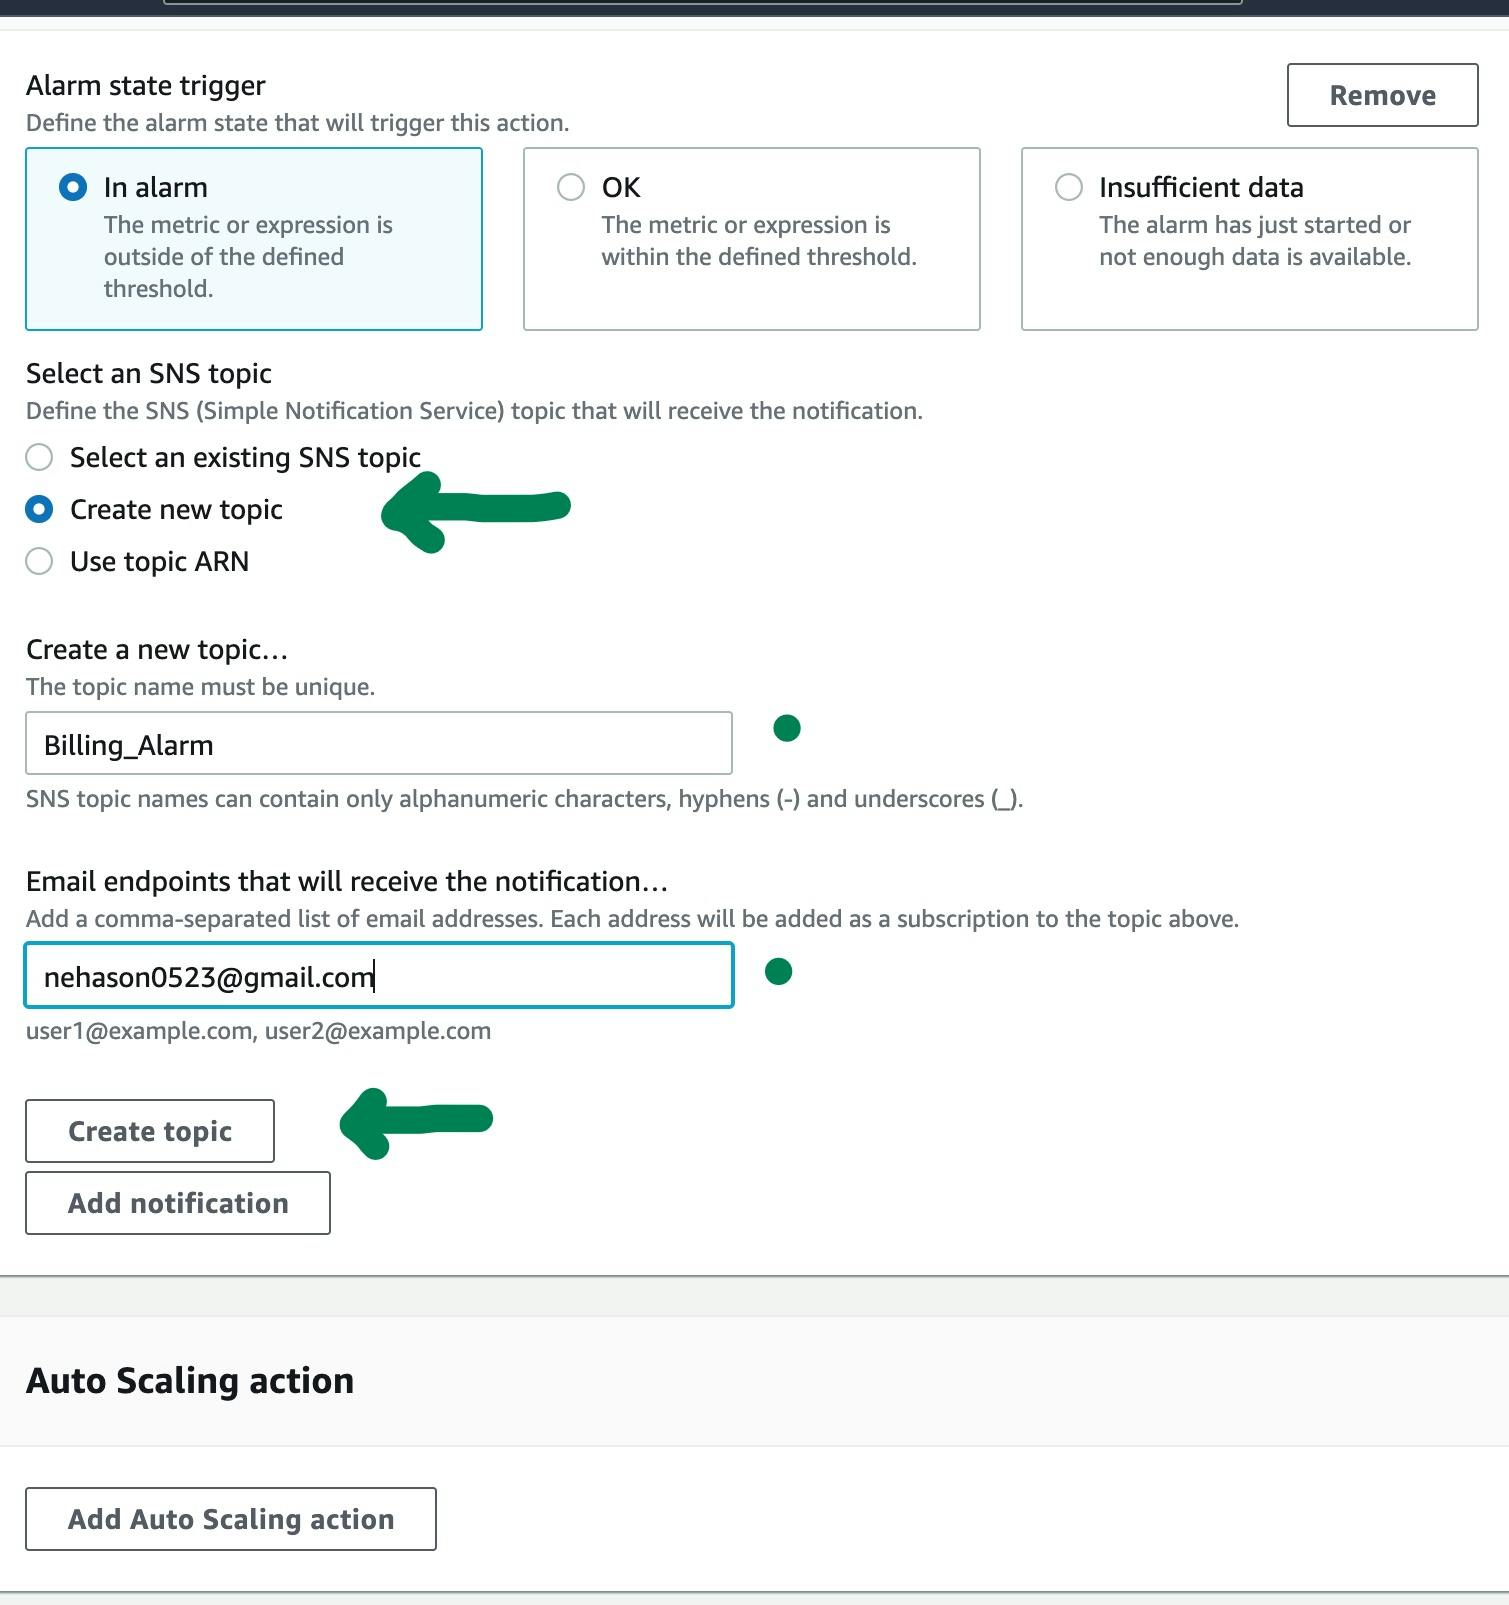 Then click on the “Next” button at the bottom of the screen.
Then Enter the Alarm name and description(optional) and click the next button.
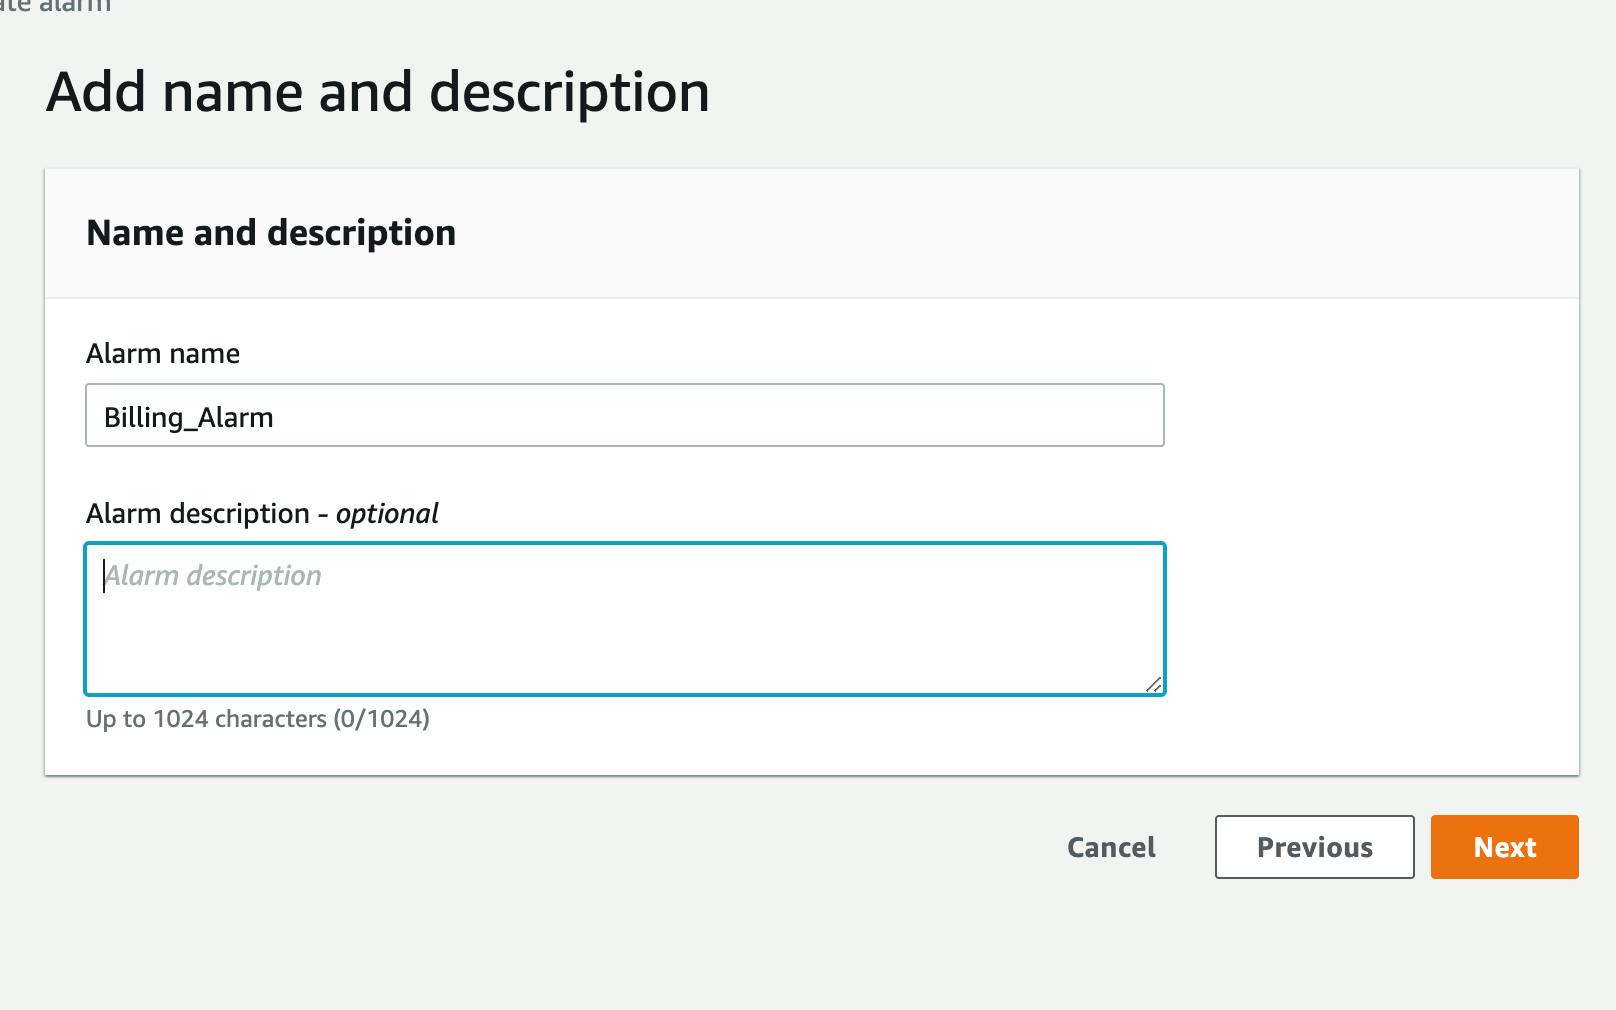
Verify details and Create Alarm
This is the final step for creating an alarm. you need to verify all details and click on the “Create alarm” button at the bottom of the screen. This will take you to the billing dashboard.
Here you can see that we have pending confirmation in the action column. For the confirmation, you need to confirm the email id that you have entered while creating an SNS topic. AWS will send a verification link to all of those emails. Just go to your email and click confirm subscription.
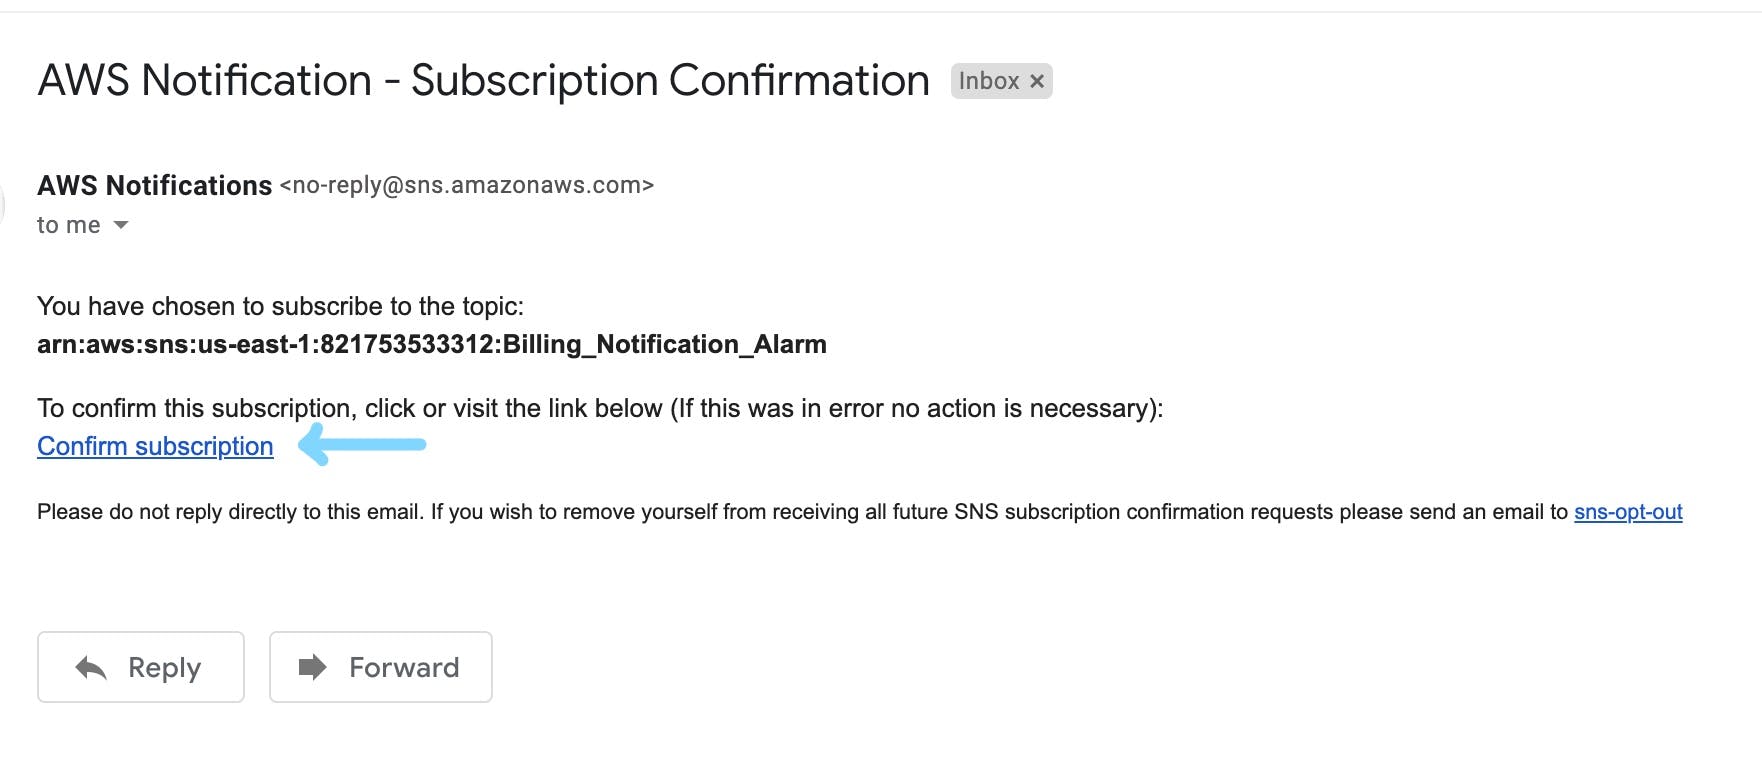 Once you click on this link, It should confirm your Email.
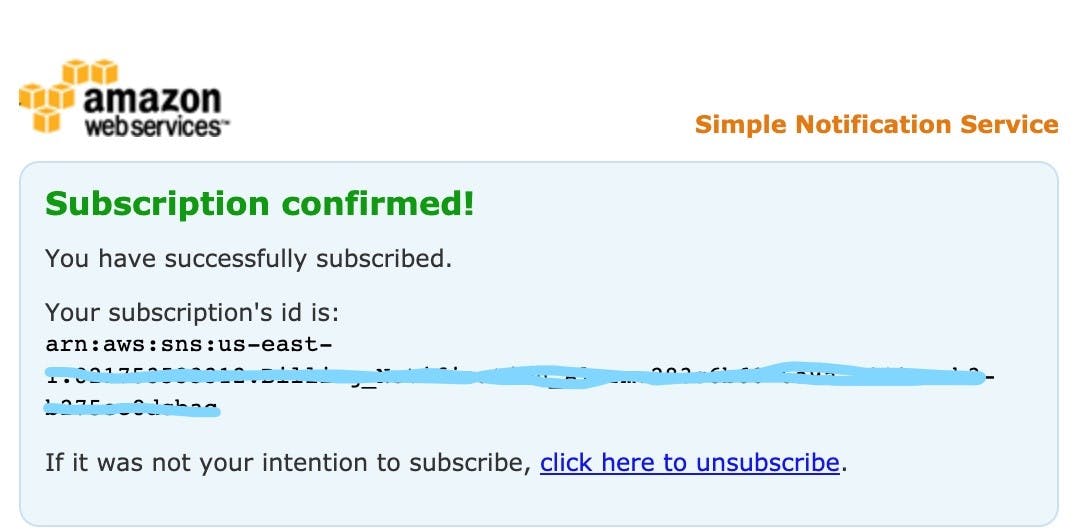 Congratulations 🎉🎉🎉🎉🎉🎉, you have set up a billing alarm for your AWS Account.
Now, you will receive alerts on this email whenever our billing alarm is triggered.
That's all for this blog post. If you enjoyed learning and find it useful please do like and share so that, it reaches others as well 🤝
Thanks for reading 😃
I would ❤ to connect with you at Twitter | LinkedIn | GitHub
Let me know in the comment section if you have any doubts or feedback.
You should definitely check out my other Blogs:
- Amazon Web Services- An Overview
- Cloud Computing- An Overview
- How to Build a Strong Professional Network Online
- Plasma Donation Website
- Playing with JavaScript Objects
- 7 JavaScript Data Structures you must know
- Digital Clock using JavaScript
- 25+ JavaScript Project With Source Code to Build your Skills
- Git & Github: All you need to know
See you in my next Blog article, Take care!!
Happy Learning😃😃
