

Hello, world👋
In this blog article, we will learn React router's concept and build a simple single-page app(SPA) using react.
What will be covered in this Blog
- Introduction to react-router-dom
- React Router Components
- React Router Installation
- Let’s create the SPA
Let's get started!
What is react-router-dom?
Routing is the key part of all the web-applications. It plays a central role in static HTML pages as well as in the most complex React web applications. React router is a standard library that enables you to navigate between the different pages without reloading your whole page. It keeps the browser URL in sync with UI(data that will be displayed on the web page). It is mainly used for building single-page web applications.
Different packages in React Router library
React Router library contains three different npm packages for routing.
- react-router provides a core routing library that that is used as a peer dependency for the other two packages listed below.
- react-router-native is mainly used for React native applications.
- react-router-dom is used in React apps for routing.
React Router Components
The basic React Router components commonly used in minimal navigation are BrowserRouter, Route, Switch, and Link.
BrowserRouter
A BrowserRouter uses the HTML5 history API (pushState, replaceState, and the popstate event) to keep your UI in sync with the URL. To enable the client-side routing we need to import BrowserRouter from react-dom-router package and also wrap our entire application inside BrowserRouter. If you aren’t familiar with client-side routing, you can learn it from here
Example:
import React from "react";
import ReactDOM from "react-dom";
import { BrowserRouter } from "react-router-dom";
import App from "./App";

const rootElement = document.getElementById("root");
ReactDOM.render(
    <BrowserRouter>
      <App />
    </BrowserRouter>,
  rootElement
);
Switch
The Switch component will only render the first route that matches/includes the path rather than rendering all matching routes. It doesn't take any props. Also, it allows for nested routes to work properly, which is something that Router will not be able to handle.
Example:
import React from "react";
import ReactDOM from "react-dom";
import { BrowserRouter, Switch } from "react-router-dom";
import App from "./App";

const rootElement = document.getElementById("root");
ReactDOM.render(
 <BrowserRouter>
       <Switch>
         <Route path="/" component={Home} />
         <Route path="/signin" component={SignIn} />
         <Route path="/signup" component={SignUp} />
       </Switch>
  </BrowserRouter>,
         rootElement
   );
Route
The route is used to render the component based on the specified path. It is generally defined with two props- path and component. Here, the path represents the URL route and the component represents the page or the component that we want to render on that path. If the path for a route is set to just "/",Switchwould always render that route for all paths as it is a match. For example, if the path we’re on is/signin, this path does include a/. As long as it includes the character, it will be considered a match, which does include nested routes.
To solve this problem, we include another prop for that route, exact. As the name implies, the path has to be the same.
Example
import React from "react";
import ReactDOM from "react-dom";
import { BrowserRouter, Switch } from "react-router-dom";
import App from "./App";

const rootElement = document.getElementById("root");
ReactDOM.render(
 <BrowserRouter>
         <Route exact path="/" component={Home} />
         <Route path="/signin" component={SignIn} />
         <Route path="/signup" component={SignUp} />
  </BrowserRouter>,
         rootElement
   );
Link
As the name indicates this component is used to create links that allow the application to navigate on different URLs and render its content without reloading the whole webpage. It is defined with only one prop- to. The to represents where to redirect upon click.
Example
<Link to="/sample">Click to redirect</Link>
Time to Code!
Now, I’ll explain how I created a simple SPA using React Routing.
To get started, first, let’s create a React app.
npx create-react-app routing-app
If you aren’t familiar with this command, you can learn more from the create-react-app getting started guide .
Then, install the react-router-dom package.
npm install react-router-dom
Finally, start the dev server
npm start
Then, add the dependency react-router-dom in package.json.
Let's start creating content pages first-
First, create a file home.js in src directory and add the following content:
home.js
import React, { Component } from "react";
class Home extends Component {
render() {
return (
<div>
<h2>Welcome to Hashnode!!</h2>
<p>
Hashnode is the easiest way to start a developer blog on your
personal domain 🌏 for free and connect with the readers through
our global dev community! 👩💻👨💻
</p>
</div>
);
}
}
export default Home;
Next, create a signin.js file in the same location: signin.js
import React, { Component } from "react";


class SignIn extends Component {
    handleClick  = ()=>
    {
            alert("Thank you for signing in 😀.");
    }

    render() {
    return (
        <>
        <div className="home">
            <h2>SignIN</h2>
            <b>Username</b><br/>
            <input type="text" placeholder="Enter username"/>
            <br/><br/>

            <b>Password</b><br/>
            <input type="password" placeholder="Enter password"/>
            <br/><br/>

            <button
            className="btn btn-success"
            onClick={this.handleClick}>
            SignIN
            </button>
            </div>
        </>
        );
  }
}

export default SignIn;
We just have one more page left. Create signup.js file in src folder: signup.js
import React, { Component } from "react";

class SignUp extends Component {

    handleClick  = ()=>
    {
            alert("Thank you for signing in 😀.");
    }

    render() {
    return (
        <>
        <div className="home">
            <h2>SignUp</h2>
            <b>Username</b><br/>
            <input type="text" placeholder="Enter username"/>
            <br/><br/>

            <b>Enter Email</b><br/>
            <input type="email" placeholder="Enter your Email"/>
            <br/><br/>
            <b>Password</b><br/>
            <input type="password" placeholder="Enter password"/>
            <br/><br/>
            <button className="btn btn-success"
            onClick={this.handleClick}>
            SignUp
            </button>
            </div>
        </>
        );
  }
}

export default SignUp;
This is all we are going to show on our web page. Make sure to save all of your changes to these three files. We'll look at how to make them useful shortly.
Let's start working on our App.js file
We have our app frame in the form of our App component. We have our content pages represented by the Home, SignIn, and SignUp components. What we need to do is tie all of these together to create our app. This is where React Router comes in. To start using it, go to the App.js file, and import the below packages:
import React from 'react';
import {
  Route,
  Link,
  BrowserRouter
} from "react-router-dom";
import Home from './home.js';
import SignIn from './signin.js';
import SignUp from './signup.js';
We are importing Route, Link, and BrowserRouter from the react-router-dom npm package we installed earlier. In addition, we are also importing our Home, SignIn, and SignUp components.
App.js
import React from 'react';
import {
  Route,
  Link,
  BrowserRouter
} from "react-router-dom";
import Home from './home.js';
import SignIn from './signin.js';
import SignUp from './signup.js';

class App extends React.Component {
render() {
 return (
     <BrowserRouter>
  <div>
   <h1>Simple SPA</h1>
        <ul className="header">
            <li><Link to="/">Home</Link></li>
            <li><Link to="/signin">SignIn</Link></li>
            <li><Link to="/signup">SignUp</Link></li>
          </ul>
          <div className="content">
            <Route exact path="/" component={Home}/>
            <Route exact path="/signin" component={SignIn}/>
            <Route exact path="/signup" component={SignUp}/>
          </div>
    </div>
    </BrowserRouter>
    )
 }
}
export default App;
As I already explained the function and need of everything we have used in our App.js file. Hope you understand things clearly. In case you have any doubt let me know in the comment section.
Adding Some CSS
Right now, our app is completely unstyled. In your src folder, create a file called style.css and add the following style rules into it:
body {
  background-color: #FFCC00;
  padding: 20px;
  margin: 0;
  font-size: 25px;
}
h1, h2, p, ul, li {
  font-family: sans-serif;
  text-align: center;
}
ul.header li {
  display: inline;
  list-style-type: none;
  margin: 0;
}
ul.header {
  background-color: #111;
  padding: 0;
}
ul.header li a {
  color: #FFF;
  font-weight: bold;
  text-decoration: none;
  padding: 20px;
  display: inline-block;
}
a:hover
{
    background-color: blue;
}
.content {
  background-color: #FFF;
  padding: 20px;
}
.content h2 {
  padding: 0;
  margin: 0;
}
.content li {
  margin-bottom: 10px;
}
input
{
  width: 100%;
  padding: 12px 20px;
  margin: 8px 0;
  display: inline-block;
  border: 1px solid #ccc;
  border-radius: 4px;
  box-sizing: border-box;
  font-size: 18px;
}
button
{
    width: 30%;
  background-color: blue;
  color: white;
  padding: 14px 20px;
  margin: 8px 0;
  margin-left: 500px;
  border: none;
  border-radius: 4px;
  cursor: pointer;
}
We are almost done here! There are just a few more things we need to do. We need to reference this style sheet in our app. At the top of index.js, add the import statement to do just that:
index.js
import React from 'react';
import ReactDOM from 'react-dom';
import App from './App.js';
import './style.css';


ReactDOM.render(
<BrowserRouter>
  <App/>
</BrowserRouter>,
  document.getElementById("root")
);
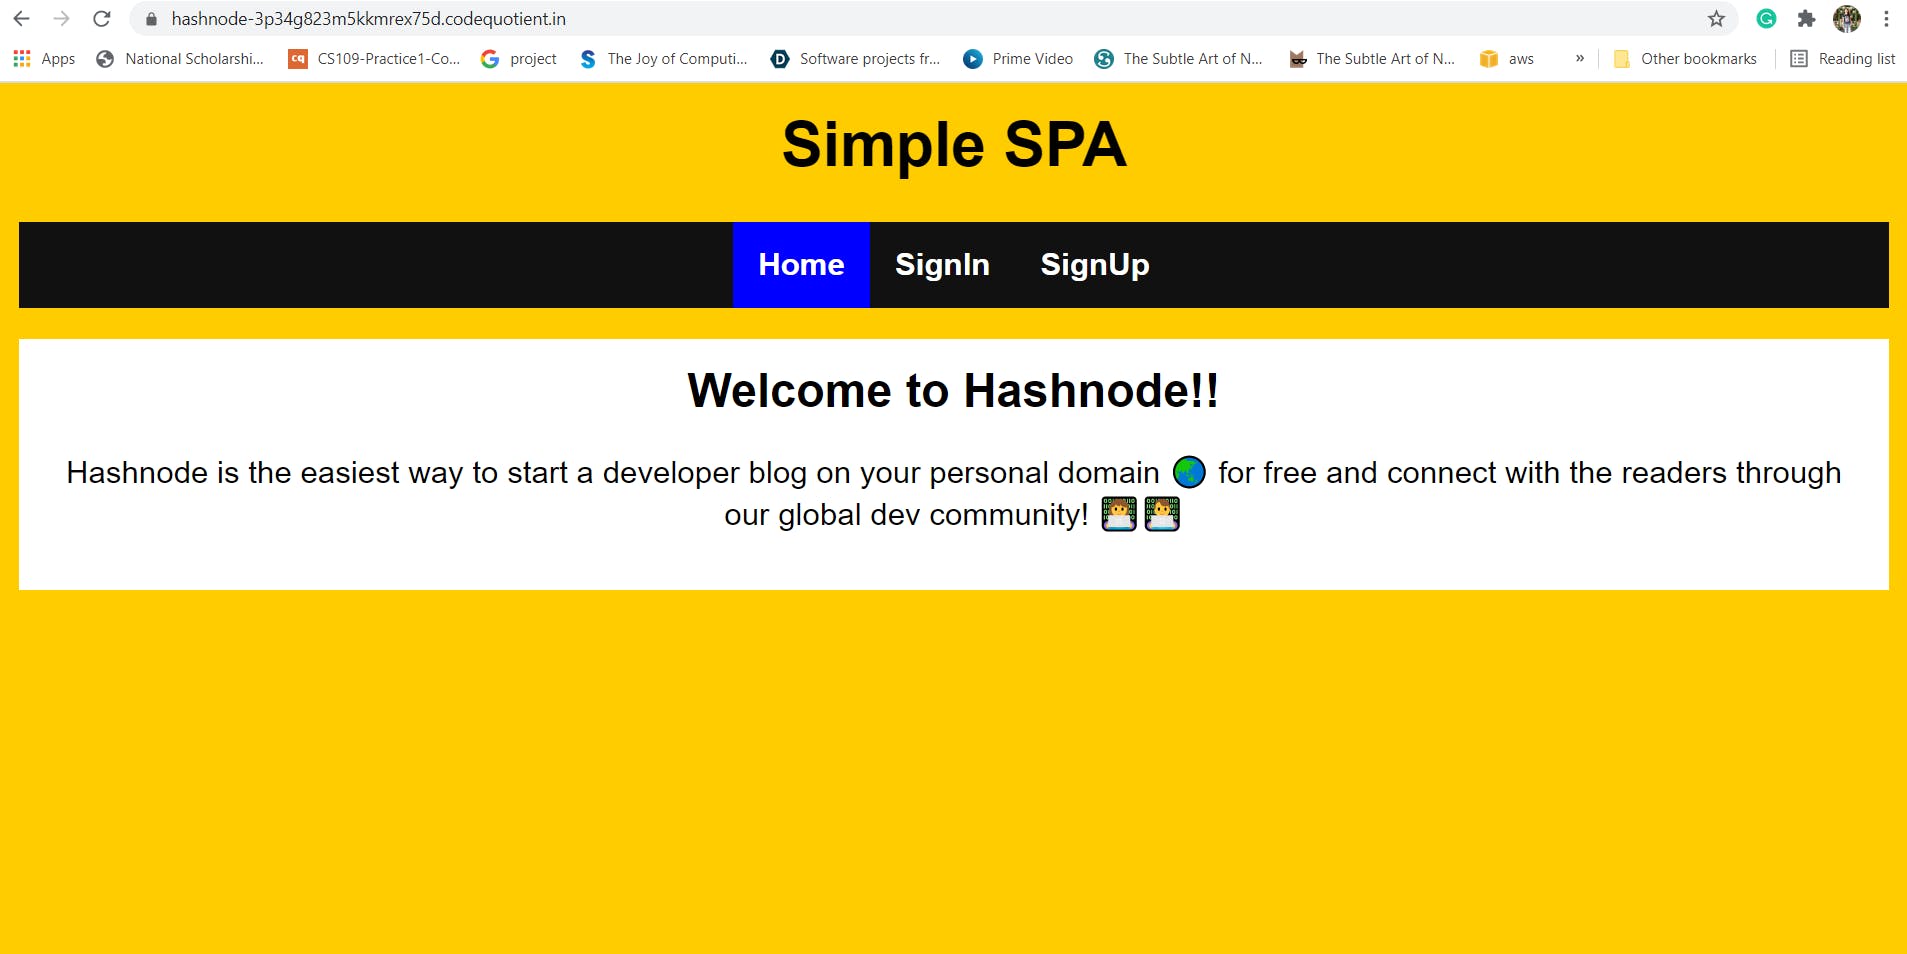
Once you have followed all the steps, go to our browser and your webpage looks like this:
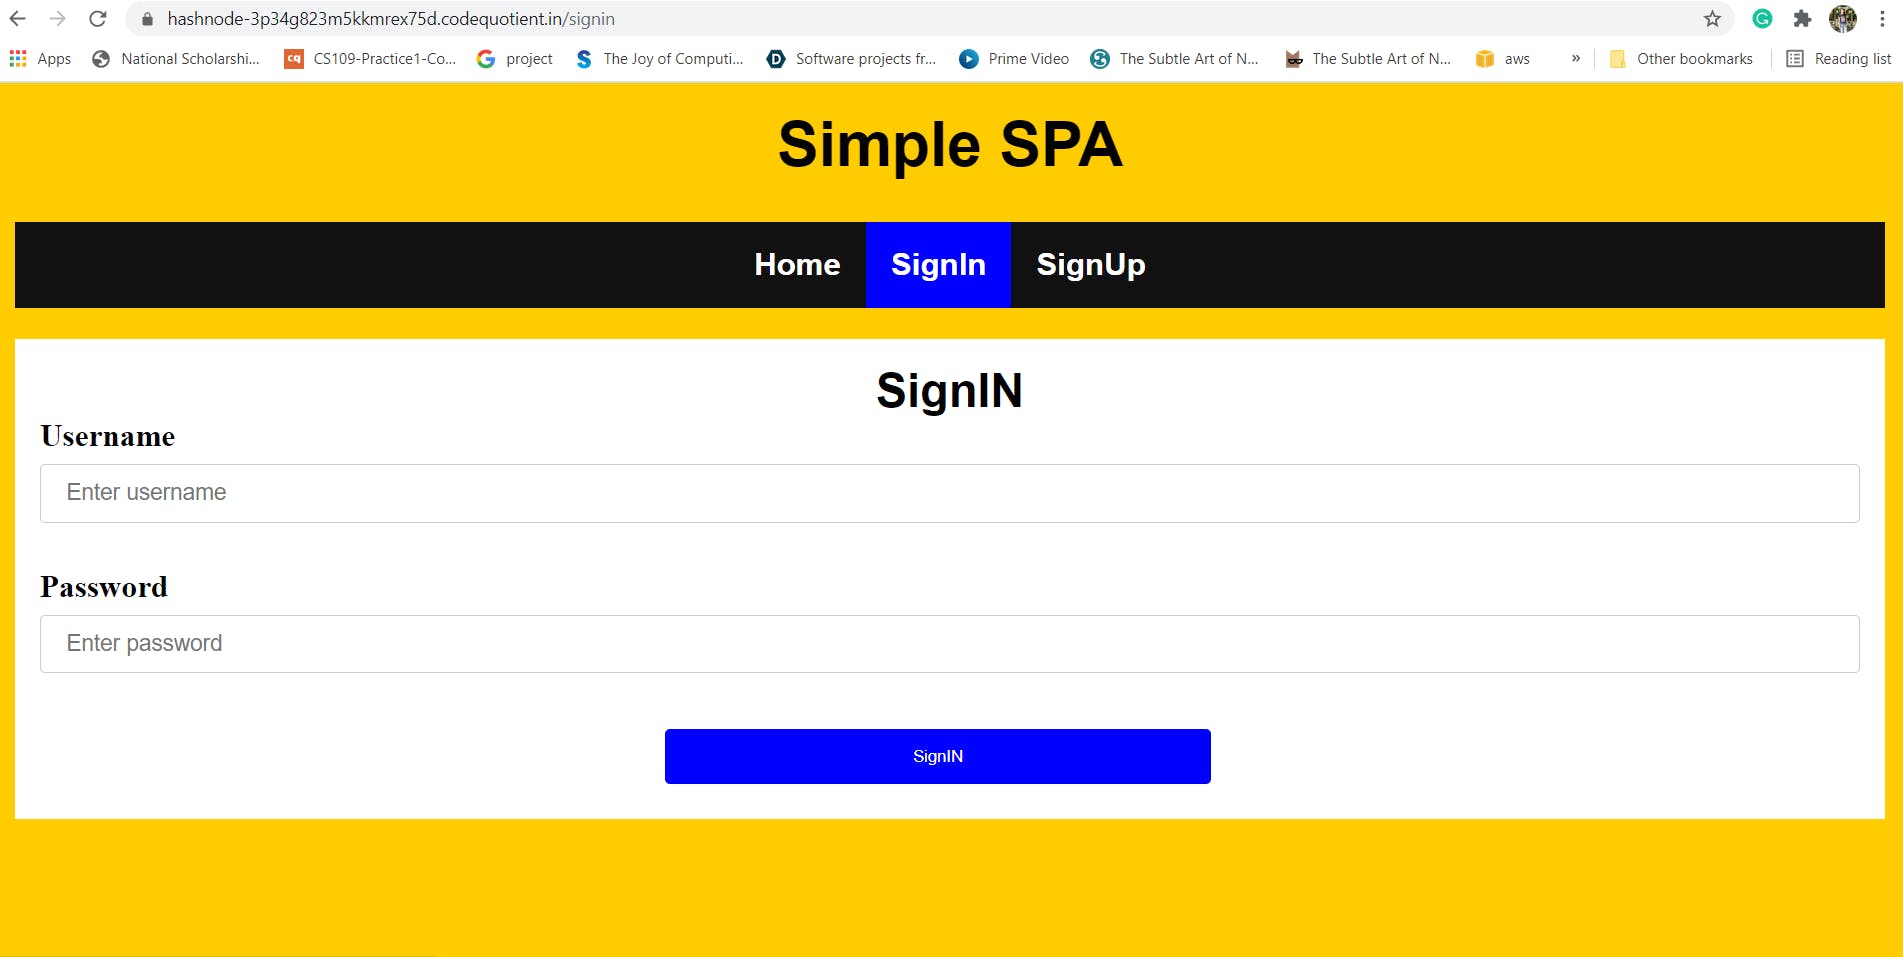
When you click on SignIn button the path changes to /signin and page will navigate to SignIn component without reloading your application.
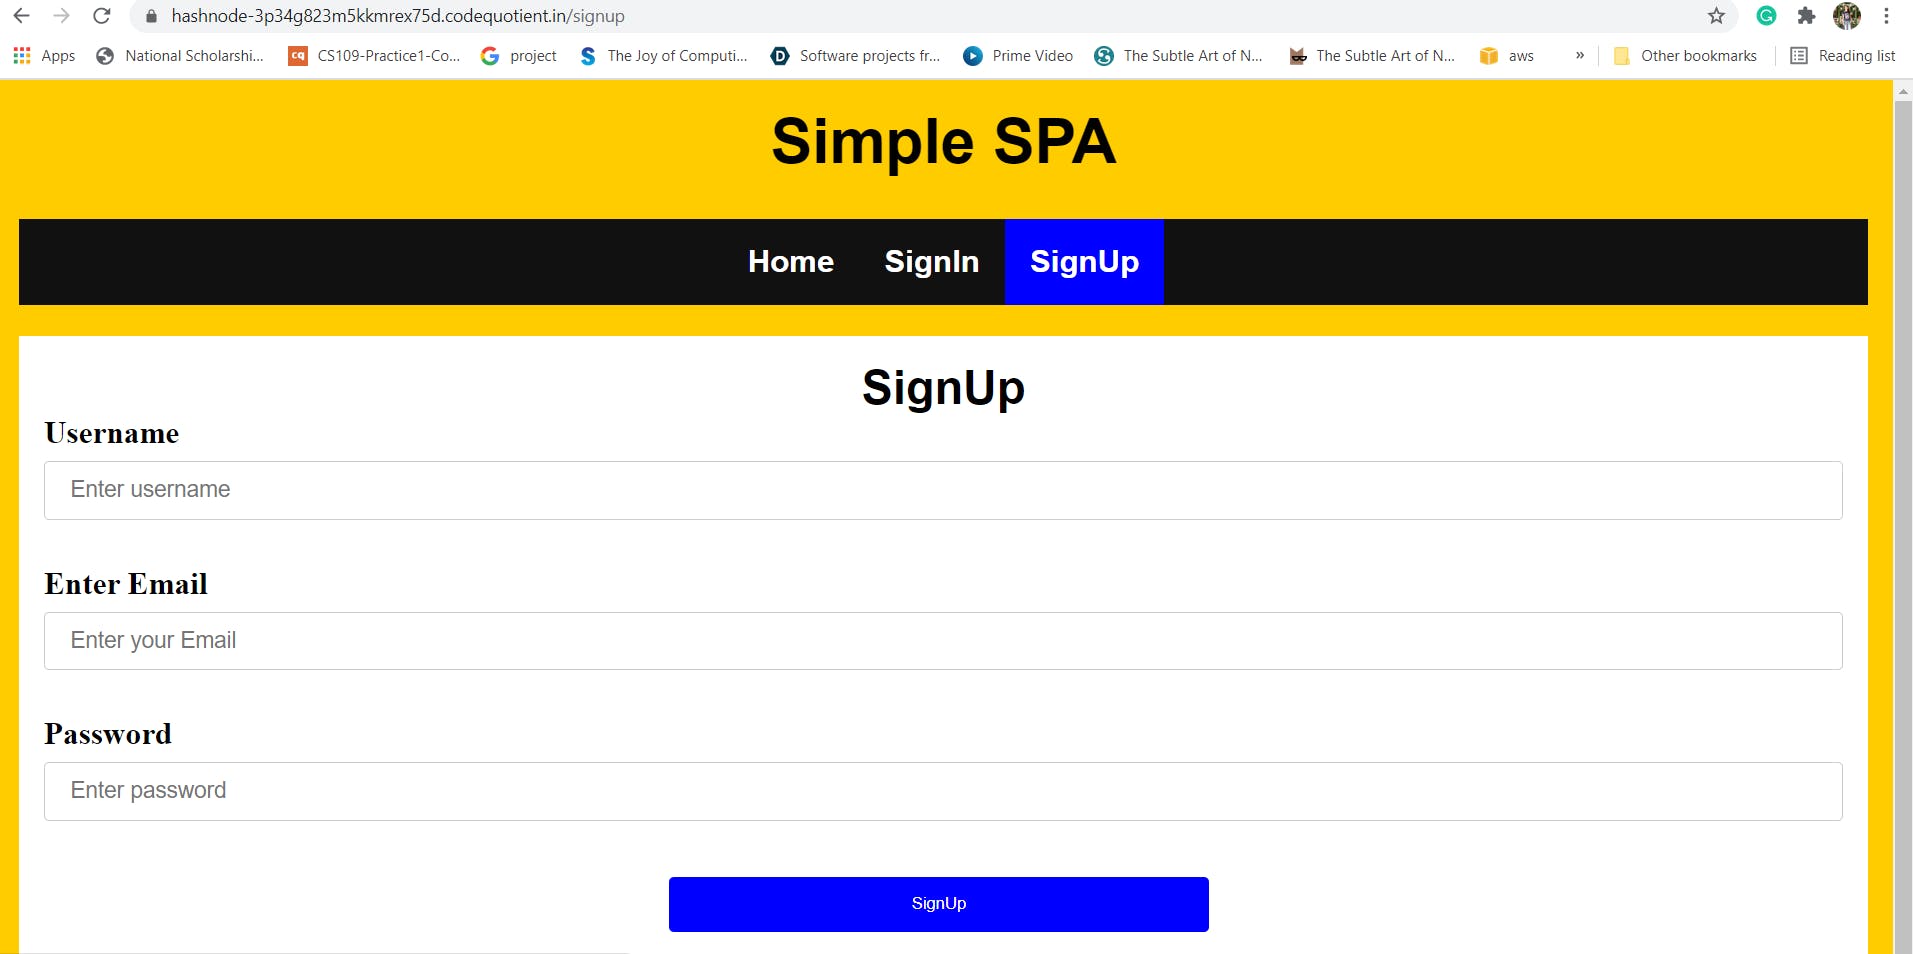
 Similarly, when you click on SignUp button the path changes to
 /signup and page will navigate to SignUp component without reloading your application.
Conclusion
React router is an awesome tool that could be of great help to your application. I hope this Demo provides an introductory guide to React Router.
You can find all the code at my GitHub Repository . Drop a star if you find it useful.
Thank you for reading, I would ❤ to connect with you at Twitter | LinkedIn
Share your queries in the comments section.
Resources
- https://javascript.plainenglish.io/how-to-add-react-router-to-your-react-app-bf764a776122
- https://www.javatpoint.com/react-router
- https://blog.logrocket.com/react-router-v6/
See you in my next Blog article, Take care😃😃 !!